(English)
The purpose of designing this tool is simply "drop WAV file and you can transfer".
That is why this software is so simple.
However, let me explain how to use anyway since this software looks a little different and surprising.
(Japanese)
このツールは"とにかくWAVをドロップしたら転送できる"を目的に設計した。
だから、とにかく使い方はシンプルなんだ。
でも、最初は見た目にびっくりして使いづらいと感じるかもしれないから、少し簡単に説明することにするよ。
![]()
(English)
Release the safety device in the Transport column.
This safely device is called "Transport Activation Switch".
If this switch turns into red, it means that the sample can be transferred and the SYRO transport stream developed by KORG can be output to the audio output immediately.
Please note that the SYRO transportation stream does not always sound good to human ears or analog audio amplifier circuits.
It might hurt your ears and machine... make sure to connect the colic sample to your computer with the stereo cable.
(Japanese)
まずTransport欄にある安全装置を解除する。
この安全装置は"Transport Activation Switch"と呼んでいるけど、赤色になっていれば転送可能っていう意味。
この赤色になった状態の時には即材にオーディオ出力にKORG社が開発したSYRO転送ストリームを出すことができる。
SYRO転送ストリームは人間の耳やアナログオーディオ増幅回路にとって必ずしも良い音ではないから気を付けて。
君の耳や機械を痛める可能性がある。
必ずvolca sampleとコンピュータをステレオケーブルで接続している事を確認しよう。
(English)
Select the sample number of the transfer destination.
There are up/down arrows on both left and right side of the window, where the numbers are shown.
You can increase and decrease the the number by using that arrows.
If that is still nothing you, spin the mouse wheel to change the values faster.
Use whichever you think is useful!
(Japanese)
次に転送先のサンプル番号を選択する。
数字の書かれた表示部分の左右に上下の矢印があるから、それをクリックして数値の増減が可能だよ。
それすら煩わしかったらマウスのホイールを上下に回転させればもっと高速に数値を変えることもできる。
どちらでも好きな方法を選んでくれれば良い。
(English)
Oops! Before you start the operation, please make sure one more time if you have connected the analog audio output to the violca sample with the stereo cable.
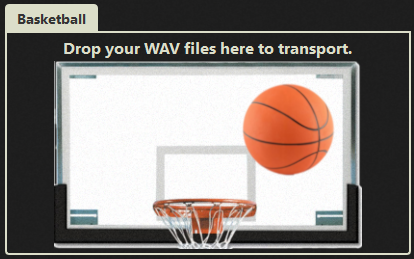
Once you have checked the conection, drag and drop the WAV file to be transferred to the tool.
(The basket goal would be a good target to drop your file, but nothing will happen for now! In case you are expecting something...)
Not only transferring one specific WAV file, but also you can transfer multiple WAV files at the same time.
For example, if you set the direction of the simple files to 10, and you transfer 3 files. In that case, WAV file data will be stored to 10, 11 and 12.
See? You can easily transfer multiple WAV files in this way.
(Japanese)
おっと、この操作を行う前に必ず、もう一度アナログオーディオ出力をステレオケーブルでvolca sampleに接続していることを確認して欲しい。
最後に転送をするWAVファイルをツールの上にドラッグ&ドロップする。
(ドロップする先はバスケットボールのゴールが良いだろう。でも、残念なことに今は特に何も起こらないから期待はしないで!)
特定の1つのWAVファイルを転送することはもちろんのこと、複数のWAVファイルを同時に転送することもできるんだ。
例えば、転送先のサンプル番号に10番を選択している場合に、3つのWAVファイルをドロップしたとする。
そうすると、10、11、12の3つにそれぞれのWAVファイルのデータが入るっていう仕組みなんだ。
こうすると簡単に複数のWAVファイルを気軽に転送できるよね。
(English)
I will introduce each part.
(Japanese)
各部について触れておくね。
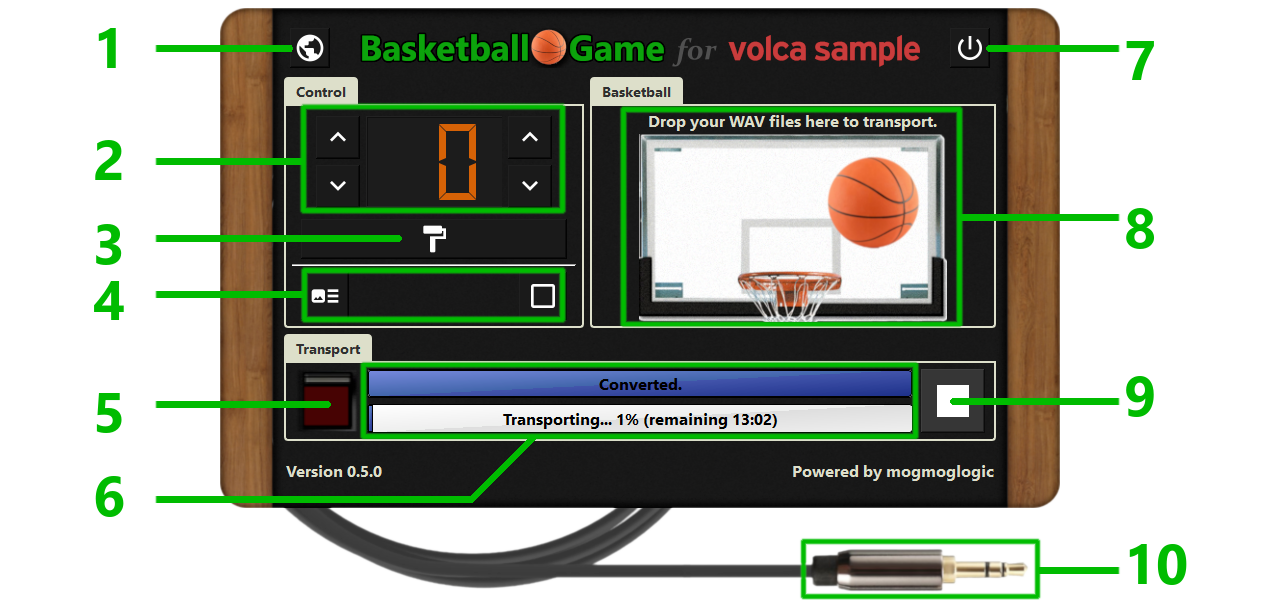
| number | description |
| 1 | Visit website You can visit the website. |
| 2 | Target sample number selector This number shows transportation sample number for the next action. |
| 3 | Target sample eraser This button allows you to erase the current sample. |
| 4 | Tools Load preset: Load the factory preset sounds. Load empty: Load the empty data. |
| 5 | Transport activation switch The transport control is disabling in the default for your safety. Please connect an analog audio cable to your volca sample first. After the connection, you can activate the transport switch to on. Do NOT try to hear the transport data stream sounds with a general audio connection such as speakers, earphone, headphone. |
| 6 | Status bars for the transportation You can check the progress for the converter and transporter. |
| 7 | Shutdown switch You can exit this application with this button. |
| 8 | Basketball game interaction Just for your fun, this is a basketball goal for the game. Drag your wav files and drop them on this. |
| 9 | Operation cancel button If you have any problem for the transportation, press this button. |
| 10 | Unconnectable dummy cable just for fun For the audio connection, you should use stereo analog cable. |